Pages

Showing posts with label pattern. Show all posts

Tuesday, 24 January 2017

Colours of Lewis: Knitted Rug

Hebrides Rug

Way back in May 2016 we went on holiday to Lewis and Harris. I love the Hebrides, the colours, the landscape, how friendly the people are and of course the textiles. I couldn't visit such an important centre of textile production without coming away with a couple of small mementos. One of these not so small mementos was a huge ball of wool made from waste threads from the production of Harris Tweed, which I got in the amazing Lewis Loom Centre.

Lewis yarn

Starting off

Moss stitch border

When I bought it I wasn't sure what I'd use it for but the colours sang to me and I knew I'd find a good use for it! The colours in the yarn are so beautiful that I didn't want to knit anything too fancy but rather I wanted something that would show them off. As both myself, Mr. Stitches and our cat are quite messy and we have a cream carpet (poor choice) I decided a small rug might be a good idea as the wool itself is quite rough so will hopefully be hard wearing. Now every time I look at the floor I'll be reminded of our lovely holidays instead of the fact that I need to vacuum!

Mega balls of yarn at Lewis Loom Centre

Inside Lewis Loom Centre

Harris coastline

If you'd like to have a go at making something similar I'm including the pattern on this post for you. It's very simple, a plain stocking stitch centre with a moss stitch border knitted on fairly chunky needles to showcase the colours of the yarn. The yarn I used is made up of 8 fine yarns spun together to make a chunky weight yarn. As exact size isn't crucial you could substitute any hard wearing chunky yarn for this project. It would also be able to make the rug bigger or smaller by adding or subtracting stitches. My rug measures around 70 cm x 50 cm and was knitted on 9 mm needles.

Detail

Detail


Pattern

Cast on 70 sts

Rows 1,3,5,7,9: K1, P1, rep. to end

Rows 2,4,6,8,10: P1, K1, rep. to end

Row 11: K1, P1 5 times, K to last 10 sts, K1,P1 5 times

Row 12: P1, K1 5 times, P to last 10 sts P1, K1 5 times

Repeat rows 11 and 12 until you have 40 rows (or there about) of stocking stitch, ending with a row 12

Repeat rows 1-10

Cast off

Enjoy!

Detail

Wednesday, 6 April 2016

Somme 100: Poppy Patterns

Work in progress on patterns

I love the diversity of my work, I love the different opportunities that come my way and the chance to work with lots of different organisations on different projects. I have just finished designing two patterns for Cumbria's Museum of Military Life, which records the history of Cumbria's County Infantry Regiment. The patterns I have designed are a knitted poppy and a crocheted poppy.

Working on the train: Trying different shapes

The patterns are available on the museums website and are part of a larger project commemorating the centenary of the Battle of the Somme. The aim of this part of the project is to create a knitted or crocheted poppy for each soldier of the Border Regiment who died during the Somme. The poppies will be displayed from the windows of the museum building, each month more poppies will be added to the display, corresponding with the number of men who died that month in the Somme 100 years ago.

Knitted Poppy

Detail

In total the museum are aiming to make 1700 poppies. It is very difficult to know exactly how many people died and when they died. A soldier may have been injured during the battle and died from his wounds many weeks or even months later. There were also of course other Cumbrian's not in the Border regiment who died in the Somme but in order for the project to work there has to be some parameters. I hope that rather than getting caught up in agonising over exact numbers people will recognise that a huge number of individuals lost their lives and each of those lives was significant and this project commemorates them all.

Crocheted Poppy

Creating these patterns was surprisingly challenging, not because they were difficult to make but because part of the brief was to make the patterns accessible to beginners. I spent a lot of time stitching and un-stitching trying to get a shape that worked but that would be easy to re-create. Hopefully I've managed that but we will see! As part of my efforts to keep the pattern simple I chose to use the stylised shape of the poppy used by the British Legion.

If you'd like to get involved with the project please contact the museum, there are a lot of poppies to make!

Wednesday, 23 July 2014

Responding to Pattern on Fabric

Framed Small Bird Embroidery

I ran an embroidery workshop at the weekend and, as I usually do, used it as an opportunity to try out a couple of new ideas and make some new samples and pieces. I often use my own drawings as a starting point for embroideries but one of the comments I frequently get in workshops is 'but I can't draw.' Now, I personally believe that everyone can draw, however, I do not want to put people off and if they have come to do an embroidery workshop it is only fair to ensure the focus is on that rather than drawing. So, I started looking at pattern in fabric and using that as a starting point. I had some lovely Ikea bird print fabric left over form a dress I made ages ago and decided to start experimenting with that.

Experimenting with threads and stitches

Detail

Detail

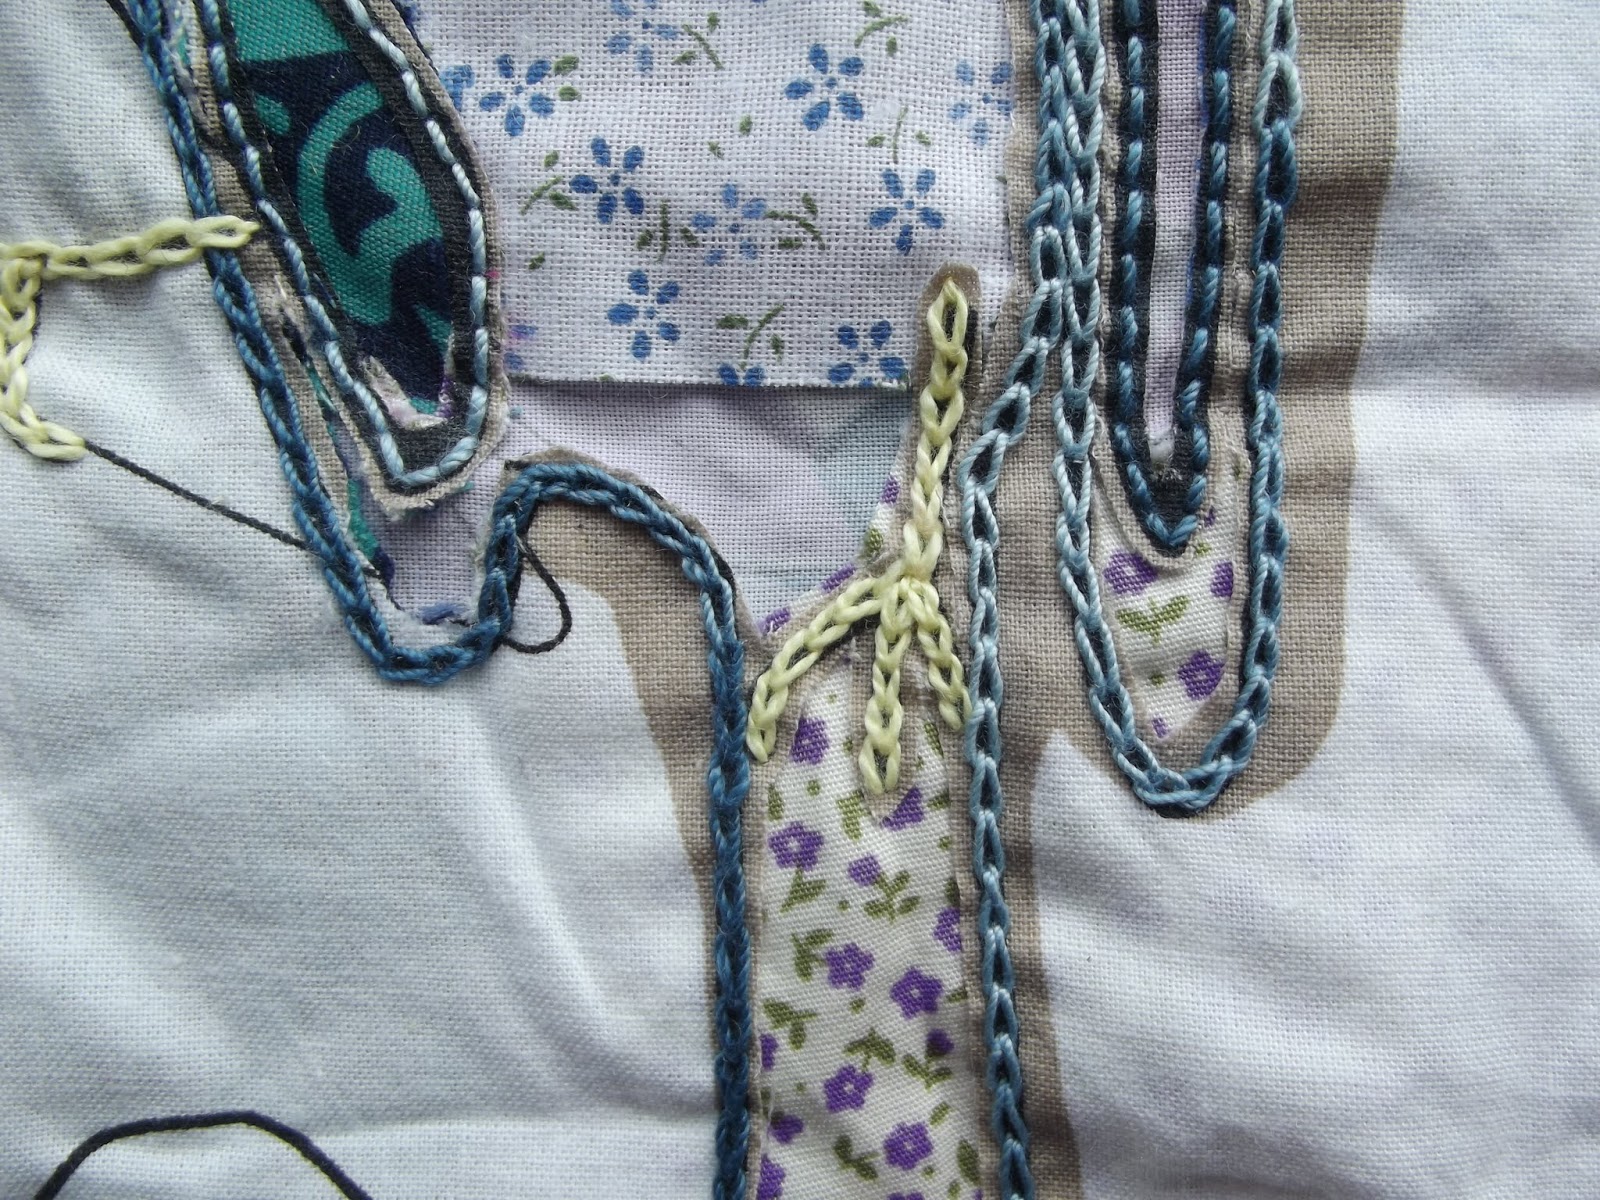
The fabric is white with line drawings of birds and some printed taupe areas. I began by colouring in some of the birds to act as a colour guide and a more interesting base to work on. I then experimented with different stitches to fill in the coloured areas and complete the birds.

More experimenting

Detail

French knots

During the workshop the participants wanted to try reverse appliqué so I started off another sample using this technique. I layered up some patterned fabrics and then put the bird fabric on top. I then began stitching around parts of the bird shapes and then cut the top layer back to reveal the patterns underneath. I'm pleased with how this piece is starting to look and am looking forward to doing a bit more work on it.

Reverse appliqué and embroidery bird

Stitch detail

Detail

I really enjoyed working these pieces, they are a lovely way to experiment with stitches and explore different thread, colour and stitch combinations. I am continuing to work on them and looking forward to seeing what new ideas they may spark.

Friday, 27 June 2014

Cosy Shells Fingerless Gloves-Free Pattern!

Tea and crochet

The finished gloves

Whilst flicking through one of my old knitting magazines I saw a pair of beautiful crochet fingerless gloves in a shell pattern. The picture was part of an advert for a wool shop but I really liked them and decided I needed to make them (rather than finish my hundreds of other projects.) From looking at the picture I knew I could figure it out myself but I was being lazy and wanted someone else to have done the thinking for me! So, I headed off to Ravelry and google but I couldn't find a pattern I liked enough so I did end up writing my own pattern and then because I'm nice I thought I'd share it with you!


It is a very simple tube pattern with an opening for your thumb, the shell pattern has a degree of stretch allowing for the changing shape of your arm and hand and I would also advise using a yarn with a bit of stretch (such as a wool rather than cotton) to allow for the varying thickness of your arms and hands.


I began by swatching and testing out the pattern using the yarn I wanted to use; Colourspun by Rowan, a wool/mohair/polyamide mix in roughly DK weight. The colours are beautiful, grey and blue spun through with bright pink and green and it works up really nicely. I'm quite sensitive to wool but decided that as my hands are pretty tough this yarn would be okay for fingerless gloves. The gloves took just over 1 x 50g ball but if you made them a couple of rows shorter or had a yarn with a better meterage (colourspun is 135m per ball) you could probably get away with one ball.


I should at this point inform you that I have ridiculously thin wrists so if you follow the pattern exactly be prepared for very cosy gloves. However, it is easy to alter them as the pattern repeats over 6 stitches so you just need to make your starting chain a multiple of 6 and long enough to comfortably fit your wrist. Alternatively if you only need them a little bigger just use a bigger hook.

The Pattern


If you find any errors or are not sure about something please let me know and I will amend or attempt to help as best I can.

UK Terms

ch: chain
dc: double crochet
slst: slip stitch
tr: treble
shell: 5tr

Tension: 10 cm x 10 cm should give you roughly 3 shells wide by 6 shells high. Change hook to gain correct tension.

Finished measurements: Length 30 cm Circumference 19 cm

Each glove is worked in the same way, make as many as you have arms.

Using a 6mm hook chain 24 and join with slip stitch to form a ring

Round 1: Change to a 5mm hook, ch1, work 1dc into each chain and join with slst in first dc (24dc)
The first dc should be worked into the same stitch as the slst from beginning chain

Round 2: Ch3 {counts as first tr}, work 4tr in same st as slst and ch3, miss 2dc, dc in next stitch, miss 2dc, *5tr {shell} in next stitch, miss 2dc, dc in next stitch, miss 2dc* Repeat from * to * all around and then join with slst in top of ch3

Round 3: Slst to middle tr of shell, dc in this stitch, shell in next dc, *dc in middle tr of next shell, shell in next dc* Repeat from * to * all around and then join with slst in first dc

Round 4:  Ch3 {counts as first tr}, work 4tr in same st as slst and ch3, dc in middle tr of next shell, *shell in next dc, dc in middle tr of next shell* Repeat from * to * all around and then join with slst in top of ch3

Rounds 5-20: Repeat rows 3 and 4 (ending with a row 4)

Thumb hole

Round 21: Work as for round 3 except replace last shell with ch5

Round 22: Work as for round 4 working last dc into third chain of ch5

Rounds 23-25: Continue with pattern as set {repeating rounds 3 and 4}

Round 26: Ch1, dc in each stitch around, join with slst.

Weave in ends, place gloves on hands and enjoy cosy feeling.

Stitch diagram: Round 1

Stitch diagram: Round 2


Sunday, 30 September 2012

Published Pattern

My pattern in print!
I've been keeping (fairly) quiet about this but I'm very excited to announce that I've just had my first pattern published. You can find it in this month's Inside Crochet (issue 34.) The pattern is for a pair of earrings made from crocheted and melted plastic bags, as you know I do love to crochet and melt plastic. I sent the pattern off in April and was so excited to have it accepted and it was really interesting to find out what goes on and what you have to do to get your pattern published. So, finally, here it is!

Issue 34

My project is mentioned in the editors letter

My picture of the earrings

Detail of the earring

Tuesday, 3 May 2011

May Day Madness!

Detail of the van covering

Detail of the minibus cover

We won!

Parading behind the bus

Banner of painted flowers
I was in Penrith yesterday preparing for and then watching the May Day Parade. I've never been to one before and it was a glorious day, which was lucky as most of the van covering was made of paper! To explain; I help run an art group for Eden Mencap Society (http://www.edenmencapsociety.co.uk/) and one of the things we've been working on recently is preparations for the May Day parade, with a theme of Alice in Wonderland. We didn't have a 'proper' float, i.e. a lorry, so we decided to improvise by making a covering for the minibus. We used card board and paper and then went to town on the decorations; flowers, mushrooms, flamingoes and other madness. We also made various costumes and the guys walked behind the minibus, all dressed up and looking fabulous! At the very back they carried a banner painted with exotic flowers that we had an enjoyable morning painting. To top it all off, we won 1st prize! So, a big cheer to all the people at Eden Mencap Society who all put so much hard work in, it was all worth it.