Pages

Showing posts with label print. Show all posts

Sunday, 5 July 2015

Seven Stories: St. Bede's School #4 Bookmaking

A stack of books and collagraph plates

Another instalment in my series of posts about Prism Arts/Cumbria Library service Seven Stories project...

Working into our book pages

Working into our book pages

Working into our book pages

Having finished all the flags for our installation I wanted to spend my last session with the class working on something they could take home. Throughout the project they've been asking if they can keep the work we've done even though they're excited about it going into the library so for a while I'd been thinking about what we could do. As we have been working on this project the children have generated a lot of supporting material, such as designs, collages and practice prints. So, I thought that making a book would be a good way of collecting all the work they've done together and giving them something they can take home and show to their family and friends. As the project is a collaboration with the library and the classes starting point was a 700 year old book in Carlisle Library there is also a nice link there too.

Taking rubbings from a collagraph plate

Working into a rubbing

Working into our book pages

As I'd hoped the session provided a good opportunity to look back over all the things we'd tried over the project and it was great to hear what they'd enjoyed and what they'd found difficult. Unfortunately the class teacher was off work but in a way this was good as it gave the pupils the opportunity to tell a different member of staff what they'd done and how. I think they were quite surprised with how much work they's actually done! As well as the collagraph prints we had collages, designs, felt samples and stencilled prints.

A medium sized dragon

A selection of pages

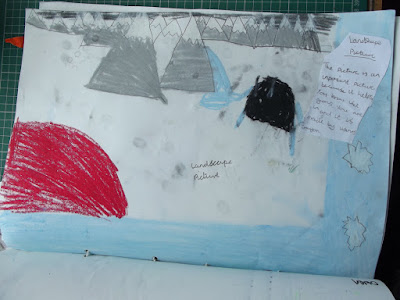
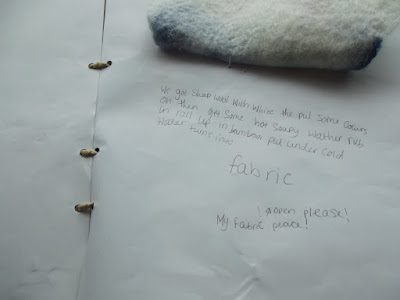
During the day I encouraged the pupils to work back into their pages, particularly the collagraph prints. We used pastels, watercolour pencils and coloured pencils to add colour to the prints and did some rubbings from the collagraph plates as well. Some of the pupils even made extra pages, developing the designs and ideas we'd worked on previously. I also asked them to write a little bit about the pages, what they did, how and why. Some of the pupils really got into this side of things and others not so much! Some of the books even feature glossaries, contents pages and acknowledgements. I find it very rewarding when I take an idea in and the students really run with it, developing and expanding on it.

A finished book

Finished books

A collaged page

For the construction of the books I wanted to keep it simple because I was working with the whole class so I hole-punched all the pages and got the students to choose a ribbon to thread the pages together with. By the end of the day everyone had a finished book; a record of what they'd learnt and something to show to others. I think they were pleased as they kept asking to take them home, I said they had to wait until the end of term!

Book pages

A finished book

A design page with  written explanation

I've really enjoyed working with this class and I will miss my Wednesday's with them. I was really touched as throughout the day the students kept bringing me little drawings they's done for me. Because the project is a long running one we've been able to get to know each other well and developed good relationships, this has allowed the pupils to improve not only their practical skills but their self belief as well. I've seen their skills and confidence grow and it is a really satisfying thing to know that I've been part of that. It will be great to see the work up in the library in November. Which reminds me, I had better finishing sewing all the flags together...

Page with felt sample...

...and description

Sunday, 21 June 2015

Seven Stories: St. Bede's School #3 Fabric Collage and Stencils

Rainforest Fabric Collage: Selecting materials

I've been working with a local school for the past few months on a big project from Prism Arts and Cumbria Library Service called Seven Stories. Recently I've been catching up on my blogging about this project, this post is about the collaged and stencilled flags we've made.

Using paper templates to cut out shapes

Using paper templates to cut out shapes

Using paper templates to cut out shapes

As I mentioned in my previous post about this project I wanted to give the students the chance to try a range of different techniques so having made our collagraph printed flags and felt flags and because I knew the pupils were really good at paper collage I thought fabric collage would be a good technique to try.

Arranging the fabric collage

Arranging the fabric collage

Arranging the fabric collage

I really like working with collage, both paper and fabric, as it is a very accessible way of working and allows for a lot of experimentation. It is also a good opportunity to get to handle different materials and to explore colour and texture. Fabric collage also allowed the pupils to have a go at pinning and tacking, skills they may not necessarily get to develop otherwise.

Work in progress

Pinning the pieces down

Arranging and pinning

One of the things I've been working on with the students is getting them to work through a process; a lot of modern life is so fast and is all about instant gratification I think it's good to do things that take time and that you have to work out. I think it helps the students understand that the more time and energy you invest in the work the better the outcome. I also think that some of the slower, more labour intensive techniques give them chance to really think about what they're doing and so gives them the opportunity to develop their analytical and problem solving skills.

Pinning

Tacking

Tacking

Making both the fabric collaged and stencilled flags involved quite long processes and as you would expect each student found certain parts of the processes easier than others. This class has been good at concentrating on their task from the start but I have noticed that over the course of the project the pupils ability to stick at things has improved and really importantly their confidence in their own abilities has grown. Because there is only one of me and 28 of them I obviously can't give them all my undivided attention all of the time, this has meant that rather than always waiting for me to say 'yes, that's right' the students have become more confident in trusting their own judgement and just going for it.

Taking pride in their work

Work in progress

Abstract arrangement focusing on colour

Another reason I think their confidence has grown is that all the work they've produced is their own, by which I mean there has been very limited input from me beyond demonstrating and explaining processes. When a student asks me what to do I tend to turn the question round and ask them what they think they should do. We can then have a little discussion about different options but I let them decide how to proceed and get them to do it. I want to support the students to create their own work, try new things and learn by doing rather than having me do things for them.

Paper stencils

Paper stencils

Paper stencils

The class really enjoyed working on the collaged flags. As always they had some great ideas and produced beautiful work. Similar to the felt flags the collaged flags were based on the different landscapes of the stories. We started by making templates to cut out shapes related to each landscape as I wanted to encourage them to try a more abstract approach rather than a pictorial approach. We then had great fun selecting and cutting fabric shapes which were then pinned and then tacked in place. I then took the flags home to sew on the sewing machine.

Using the stencils

Using the stencils

Using the stencils

Building on the idea of shapes for each landscape we took a similar approach to making the stencilled flags. Making stencils can be quite difficult, it can be very hard to visualise which bits to cut out and which to leave to create the image you want so I was impressed with the stencils the class produced. As with a lot of the techniques we've been working with simple shapes often work better than complicated ones and some of the pupils whose work is small scale and intricate found this quite hard. However, everyone ended up with a usable stencil and was able to make a flag, as before some really beautiful work was produced and this activity was a really good example of how the students have learnt to persevere and keep going until they get the result they want.

Flags hung up to dry

Stencilled owls

Stencilled snowflakes

So, we now have collagraphed flags, felt flags, collaged flags and stencilled flags. These will be sewn together in pairs to make double sided flags which can then be sewn onto ribbon to make a string of flags ready to be installed in the library in November. Best get stitching...

Wednesday, 17 June 2015

Seven Stories: St. Bede's School #2 Collagraphs and Felt

Detail from a stitched and coloured collagraph print

Since March I've been working with a class at St. Bede's school on Prism Arts second library project. Looking back over my blog I realised I've only written one post so I thought I'd do a short series of posts covering some of the things we've been up to over the past three and a bit months.

Preparing paper with tea bags

Painting the blocks with printing ink

Using a roller as a brayer for an even print

Before I started working with the class they'd been working with a writer, Mr. Beautiful (aka David Napthine) on stories inspired by a 700 year old manuscript they'd seen when they visited Carlisle library. So, as you can read about in my previous post, I began by making collagraph plates with the students based on the characters in their stories. We used the collagraph blocks to make a series of prints on paper and fabric. One of the things I got the students to do was to prepare some papers using tea bags to give more of an 'ancient manuscript' feel (and because it's fun and it's good to think about the surface you're working on rather than always using plain white paper.) Some of the prints they produced from these blocks are fantastic and we spent a bit of time working back into the prints with fabric crayons and stitching.

Moment of truth

Revealing the print

Multiple prints

The basic theme we've been working on for the library project is vessels and I wasn't sure how or what kind of vessel we would produce as a class. However, I began the project confident that along the way the pupils and I would come up with an idea or the work would naturally start to suggest a finished form. When we were looking at the finished collagraph prints one of the students said "they look like flags" and he was right, they did. This led to me thinking about prayer flags and so we decided that our finished piece would be a set of flags inspired by the characters and landscapes of their stories. This is possibly stretching the term vessel but it just works so beautifully with the work the students have produced that I think it's an allowable stretch!

Print on prepared paper

Print on fabric

Print on fabric

Having decided we would make flags I started thinking about the construction of the flags and what I wanted the students to get from the project. I wanted to give them the opportunity to try a wide range of techniques and experiment with different media as often in schools there is not the time or resources for this to happen. I think this is a great shame as I believe creative activities are really important to help develop imagination and problem solving skills, motor skills, communication and team work skills and to build confidence and self esteem. It's also a lot of fun and I think that's a lot more important than we think.

Stitching into the collagraphs

Adding detail with fabric crayons

A finished coloured and stitched collagraph

Once again, I digress. having made the collagraph prints we needed to make a second side for the flag. I was very inspired by the collages they'd made in the first week with me and thought they would lend themselves well to felt making. I also liked the idea of having the characters on one side and the landscapes on the other.

Preparatory drawings and pastel studies

Blending colours

Laying out the samples

I started out by getting the pupils to create the landscapes from the stories in pastels, as they blend well which helps in getting into the mindset for felt making, before making small sample pieces of felt. I wanted them to make samples for several reasons, firstly it's a good way to get used to a technique without the pressure of producing something 'finished.' Felt making is a very accessible process but like everything the more you know about it the more things you can do with it. I wanted the students to have a chance to encounter some of the potential problems and find out how to solve them before they started on their flags for the library. Secondly, throughout the project I have been encouraging the students to keep all their preparatory work (sketches, collages, print blocks and so on) so that at the end of the project we can each make a book showing the techniques we've experimented with and how we got to the finished piece.

Rainforest sample

Some of the finished samples

The samples the students produced were excellent. Building on their experiences from the collagraphs I reminded them that this wasn't the best technique for getting fine detail and often, simple bold shapes worked better. I also encouraged them to look at carefully blending their colours to create different effects. As well as creating lovely samples it was also great to see the pupils helping each other out and working together when it came to rolling the felt.

Laying out the flag pieces

Adding hot soapy water (not milk)

Starting the felting by rubbing gently

The next session we moved on to making our flag felts. This was really interesting as the flags needed to be laid out much bigger than the samples (felt shrinks to between 20-50% of the original size) and this change of scale seemed to be quite challenging for a lot of the pupils. They also seemed to forget, or chose not to heed, a lot of the things they'd learnt previously about laying out the fibres as finely as they could and in particular being gentle when we started the felting process. However, we overcame these challenges and each student produced a successful piece of felt. Felt making can be quite physical and I think the challenge of working hard on a process for two sessions on the trot was difficult for some of the students. They like instant results and to be on to the next thing!

Team work rolling the felt

Team work rolling the felt

We also made some felt beads

I mounted the finished felt onto coloured fabric so that when we came to make the flags all the pieces of work were roughly the same size. It was interesting seeing how different all the pieces were, reflecting the individual character of each child.