Pages

Tuesday, 22 October 2013

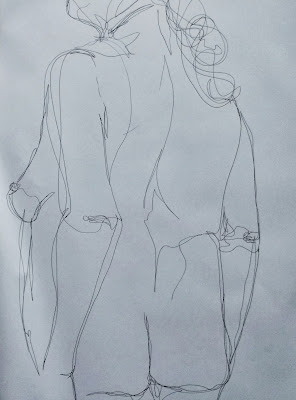
Life Drawing 17.10.13

Continuous line, pen

We had a new model for this session and it was really interesting to see how how models approach poses very differently. We had some great poses and it was a nice challenge to have someone unfamiliar to draw.

5 minute pose

5 minute pose, several drawings on one sheet

Hands and a foot!

I was really pleased with my drawing tonight. Unusually I took a lot more time than usual on the longer poses (just doing one drawing rather than several) and although there is always room for improvement I'm pleased with some of the results.

15 minute pose, pen

30 minute pose, water-soluble graphite
I also went back to my water-soluble graphite this week and am pleased with the way the drawing has come out. It was an interesting pose with the legs turned in which made for some funny angles but a good challenge.

Continuous line

Hand study

Foreshortening

I really enjoy running these sessions but it is sometimes a difficult balancing act. From a drawing point of view it is great to have new models, giving us a different challenge and stopping us relying on what we know and focusing instead on really looking. On the other hand, the 'familiar' models have all been great models, been reliable and helped get the group started so I don't want them to feel they've been 'dumped' in favour of, literally, a new model. I'm hoping that next year I will be able to offer sessions to everyone and no-one will feel left out!


Saturday, 19 October 2013

Jimmy Sparks the Dragonfly

Felt and willow sculpture

Over the past six weeks I have been working on a project to make a dragonfly sculpture. Prism Arts were commissioned by Tullie House and The Solway Wetlands Project to create 3 sculptures of wildlife found in the Solway wetlands. We chose to make a natterjack toad, a common hawker dragonfly and a lapwing. I worked with my textiles group up at The Heathlands Project  as well as the other artists working on the project.

Felt sample
It has been a really fun project to work on and a great chance for the guys I've been working with to experiment with different felting techniques and for me to improve my willow weaving skills. Unfortunately we were on quite a tight time scale so we did not have as much chance to experiment as I would have liked but the guys worked incredibly hard and have produced a great piece of work.

Willow wing frame

The guys started off by making drawings and some felt samples after looking at lots of pictures of the common hawker. I worked with the other artists on the project creating the frame for the dragonfly. It was great working together as we were able to help each other out find solutions for the problems we encountered.

Body frame

Head and thorax
We made the felt for the head and body first, using merino tops and lots of graft! For some of the people on this project it was the first time they had made felt and the pieces they produced are really high quality. We added lots of sparkly fibres as well so that the finished pieces would catch the light and shimmer, like a real dragonfly.

Laying out the body felt

Laying out the body felt

For the felt for the eyes we added lots of circles of net and organza to look like the many lenses of an insect eye.

Eye felt with net and organza circles

The next step was making the wings. For this we tried nuno felting. This involves using a sheer fabric as a base and then felting the wool fibres through it. Using the fabric as a base allowed us to create a piece of felt that was strong enough to use for the wings but still light and  semi transparent. We used silk chiffon as a base and lots of the sparkly fibres to create a shimmery, wing like fabric. Everyone worked together on one big piece and it was a real team effort.

Nuno felting

Nuno felting

I then worked with one of the guys one to one to embroider the wings using metallic thread and machine embroidery. We used pictures of the wings as a reference and worked section by section to build the pattern up.

Embroidery in progress

To add the bright spots of colour onto the dragonfly and to create the details on his face we used needle felting. This involves using a barbed needle to push and pull the fibres through each other to felt them.

Needle felting the body spots

Needle felting the face


With all the pieces of felt made and embellished and the frame made the final step was putting it all together. I used strong thread and a few curse words to securely sew all the felt pieces together and onto the willow frame. When I took the finished sculpture back to the guys they were really happy with it and decided to call him Jimmy Sparks.

Face detail

The underneath

Wing detail


Along with the toad and the lapwing Jimmy was delivered to Tullie House this week where they will soon be displayed.

Tuesday, 15 October 2013

Life Drawing Winter 2013


The last few life drawing sessions for this year! I can't believe how quickly it's all come around. As ever, feel free to come and join us and get in touch if you have any questions.

Sunday, 6 October 2013

Life Drawing 3.10.13

Drawing with loops
I've talked before about how mood affects my drawing and vice versa and this session was a good example. At the start of the session I was quite stressed and uptight because a few things had gone wrong beforehand (well, not so much gone wrong as not gone right!) but by the end of the session I was feeling relaxed and more energised. This was also reflected in my drawings, I found it hard to focus at first but soon began to relax and enjoy my drawing.

Drawing with loops

Drawing with loops

Martin, as ever, gave us some excellent poses. He used an umbrella for the first warm up poses which was great, it was a bit 'Singing in the Rain' which was very appropriate given the weather. It also led to a conversation about themes and the idea of doing themed sessions, I think it could be an interesting one to explore. Funnily enough it also came up in an email conversation with another model so I think there must be something in it!

Paring things down

'Blind' drawing

I was experimenting a bit with my pen drawings this evening, trying out drawing in loops and then in contrast paring the lines right down to try and capture the essence of the pose. The results were mixed but like all experiments some useful and interesting bits came out.

Pencil loops and lines

Pen

Pen loops

The next set of sessions takes us up to Christmas so if you feel like a bit of relaxing drawing in the madness that is the festive run-up come and join us. All the details are below but feel free to contact me if you have any questions.

Life Drawing in Carlisle

Friday, 4 October 2013

Owl Embroidery

Owl Embroidery

I started this owl way back in the year as a 'working sampler' for some embroidery workshops I was running. I used a wooden hand carved printing block to take a rubbing using fabric crayons and then I began embellishing the rubbing with stitch. Over the year the sample has grown as I've done various workshops and this week I got it finished off. I always like to have a work in progress when I'm running sessions so that I can use it demonstrate techniques on a piece of work rather than just a plain piece of cloth.

Ear detail

Head detail

I really love the block that I used and have made several prints and rubbings from it for other projects. This is probably one of my favourite things I've done with it though as I think the stitching adds to his quirky and slightly scruffy appearance. I used my favourite colours and the stitching is mostly chain and feather variations.

Body and wing detail

Body and wing detail

Body detail